Monday, January 30, 2012

The Sweet Look of Bitter Chocolate... Paint Afters!

The master bedroom has finally been painted!!!  Goodbye forever green! 

Here are a couple 'before' and 'after' photos of our paint selection.  Sorry the 'afters' are a little dark, we finished up yesterday as the sun went down (in case you are worried, just know we didn't paint it black).

The color we chose was Behr's Bitter Chocolate from Home Depot. It is a very dark brown with a hint of a warm redish tone when light hits it.  I'm so much happier with our room in this color, it is just more "us" than that pale green ever was. I have to give my hubby props for sticking to his guns about the color.  I was leaning toward a dark gray (similar to three other rooms in the house) and he kept pushing for something that was more brown based.  Once we got a sample up on the wall, I was sold... Here you go Alex, "You were right honey, Bitter Chocolate is perfect."
 Oddly enough, the prep time took longer than actually painting.  Does that happen to anyone else?  Our project started on Saturday night. We had a whole lot of patching to do on the walls.  The worst was the wall shown below.  It had some terrible plaster wall repair done by a previous owner at some point.  The repair consisted of some dry wall tape and a MOUND of plaster covering a giant settlement crack that Alex needed to correct.  He just kept sanding, and sanding, and sanding.  That small spot just kept getting bigger and bigger.
After working on that wall, Alex hopped over to a very long settlement crack that hadn't been patched previously.  He opened the crack with a hammer and screw driver and then....
Added on some Dap Dry Dex patch. 
Once the patch dried and hardened, Alex sanded them to a smooth even finish.  Then we were ready to paint!!!!  Woo-hoo!!!

That took us to the next morning. 
We got up bright and early, did a bit of cleaning and poured the paint!  Alex captured my excitement as the first bit of Bitter Chocolate went up on the walls.
Then, the rest of the paint project went pretty fast...
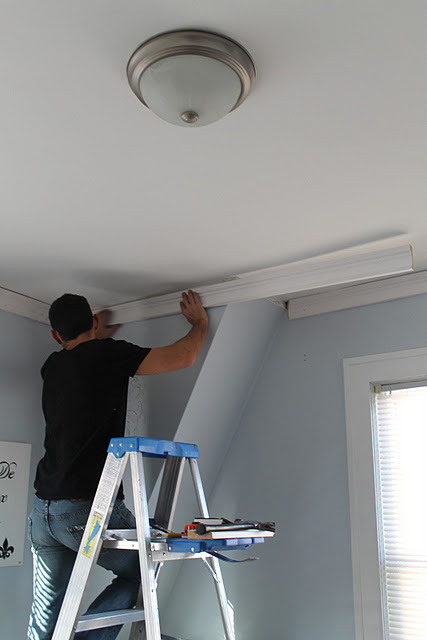
We ended up painting this little archway Behr's Polar Bear (white) to add some dimension.  I think it was a good choice to enhance the architectural detail of our room.
Again, here are some 'afters', but I think you can get a better idea of the color from the daytime photos above (and yes, the blue painters tape is still up in these photos).
I'm totally LOVING it!!!! 
I can't wait to start decorating.  I've been eager to attack this room redo for soooo long!  I mentioned it on May 8th, 2011 when it was supposed to be our next project... then the tornado happened and ruined that plan.  I have a lot of fabulous plans for this room (since I've been thinking about it for a year) and I can't wait to share my design plan/ vision soon! That Bitter Chocolate is going to be a fab back drop for what we have in store!
  Stay tuned...

Sunday, January 29, 2012

Some Action in the Master Bedroom

It's been three long years, but we finally have some action going on in the Master Bedroom!  Alex is doing some nice stripping and I am putting on a skimpy little blue number.
In case you have your mind in the gutter...
 We're talking about stripping some poorly executed plaster wall repair left behind from a previous owner using a belt sander and putting up our trusty blue painters tape.
All in preparation to FINALLY attack our Master Bedroom redo!!!  This project is long overdue (three years in the making) and I am thrilled it is finally underway.  Not to mention we are getting closer to checking one of our projects off our 2012 wishlist!

I'll share more soon about the 4th "Little Behr" we took home and fell in love with for our room.  But for now, I have to get back to the dirty business in the master suite.  And I mean REAL dirty...
Note: My hubby isn't a "silver fox" yet.  That is all dust from sanding, it's yucky business.

See you tomorrow for our paint color selection!

Friday, January 27, 2012

Head Over Heels Friday: Valentine's Finds On Etsy

Ahhh, can you feel it?  Love is in the air!

Hmmm, maybe it isn't yet since Valentine's Day is still a couple weeks away.  The only Valentine's Day type of thing that is hanging around now is on our mantel.  Well, that and a whole bunch of conversation hearts I have in our candy jar (is is just me, or are the orange colored ones the better tasting ones?).  Anyway, with Valentine's Day looming I started looking at all the cute gifting ideas on Etsy and wowzers are there TONS! 

I picked a handful of favorites that I am totally Head Over Heels for.  These finds are easy to fall in love with...

What do you think? 
Are there any that you are Head Over Heels for too?
Do you buy your special someone a gift on Valentine's Day?

Have a splendid weekend!  I hope ours includes finishing up a few projects (and starting new ones as usual!).

Wednesday, January 25, 2012

Kitchen Nook Progress... Slowsky Style

It's time for an update on the action happening in the Kitchen Nook!
I admit, we have been real "Slowskys" with this Nook project which makes me feel a bit guilty.
Note: Alex is the grumpier looking turtle
In case you missed the last post about the Nook (click here for the link), we wanted to add a Hutch to the space in order to gain some more kitchen storage.  The photo below is a look at the Kitchen Nook before we started tinkering with the space. We only had those open corner shelves and a couple shelves under that bar table.
Once we moved the bar table and added in the hutch (which I scored for only $40), we knew we would have to take down those open corner shelves.  It would have looked super goofy keeping them up since one was hidden behind the hutch.
(My apologies for the mess, it happens during the work)

Alex took them both down and patched up the holes where they were hung. PS- if you are local and interested in taking those corner shelves off our hands send me an email! 
After patching, Alex got the walls repainted and looking fresh (we'll cover that in our 'After' post).

Now, for the hutch that was screaming for a makeover...
As I mentioned in the last post, I was SUPER excited about this $40 find but it needed some work.  I tore out those gross fabric shade covers and picked up some glass for the top cabinet doors at North End Hardware.  I highly recommend North End Hardware if you need replacement glass, they cut it for you on the spot!  Total cost for 2 pieces of glass $12.64!
I also got the new cabinet hardware picked out.  I thought stainless steel knobs and drawer pulls would look much more elegant than the plastic white knobs.
That's the update for now.  Sorry, I realize that might have been anticlimactic, but like I said we have been Slowskys.  I think we have narrowed down our choice for the opposite side wall though.  Fingers crossed we can get it all done over the weekend, wish us luck!

  Can't wait to post about the final look!

Sunday, January 22, 2012

Goldilocks and the Three Behrs

There once lived a girl with golden locks who was very fond of home decor.  She often spent her time dreaming up ways to make her living spaces more beautiful.
One day, she walked and walked until she found a big orange building. There, she was given three little Behrs of inspiration.
She brought the Behrs home in hopes of finding the right fit for her and her husband's sleeping quarters.  Each little Behr settled in to what they hoped would be their new home. 
Then, after reviewing three little Behrs in different lighting she began to realize something about each one.
The first Behr was too green-y
The second Behr was too brownish.
The third Behr was too black, like straight colorless black.

None of the Behrs were quite right. So the girl with the gold locks wandered back to the big orange building in hopes of finding a Behr that was just right.

The End To Be Continued

***************************
Okay, we're still working on the Nook, but we've also been trying to narrow down a paint color for our Master Bedroom. I think we have been trying to pick a color for a year now, I might even think about it in my sleep. I guess we'll see if we can make a final decision soon, at least we agreed on a direction to head in!

Also, to write this post I had to re-read the story of Goldilocks and the Three Bears.  After refreshing my memory on the details of the story, it made me think about how rude and crazy Goldilocks was.  I mean, really, who breaks into someone's house, eats their food, breaks their furniture, and then passes out in a strangers bed?!?  Goldilocks was one crazy stupid lady. 
Have a great week everyone!  I'll be posting follow ups for these projects and more soon!

Friday, January 20, 2012

Head Over Heels Friday: A Parade of Projects in Honor of the Birthday Boy!

Today isn't any ordinary Friday, nope, this Friday is extra super special because...

It is my hubby's 28th birthday!!!!!

In honor of Mr. Hammers and High Heels (I wonder if Alex minds that title?) I wanted to have a big ol' parade down the street!  But due to the "arctic blast" we are experiencing here in Minnesota, I wasn't able to coordinate the marching band, fire trucks, elephants, ponies, clowns and all the other parade floats as planned. 
Bummer I know. Elephants and ponies don't like negative wind chill temps.

So instead, I have arranged a little visual parade of Alex's DIY projects to honor his birthday here on the blog!  I think he will love this surprise feature and celebration of his hard work!  Oh, did I mention it is a surprise?  He has no idea I am writing about him for this Head Over Heel's Friday, hehe!  Links to the full posts included below each photo if you would like to view the tutorials.

Happy Birthday Alex!
I'm Head Over Heels for all of your handy hard work (and you of course)!


(PS- it makes me so sad looking at our yard and our neighbor's before the tornado, I miss all of those beautiful trees!)


Thanks for celebrating Alex's birthday with us blogger style!

Now, I'll have to keep my hubby out of trouble tonight.  What kind of trouble you ask?  I happen to have a great example from Alex's 23rd birthday.  Here's Alex...
  He is riding the penny pony at Meijers holding a stuffed animal and a case of beer.  A store employee warned him that there was a weight limit and Alex yelled back, "No, it's okay, I'm the Birthday Boy," and pointed at the "Birthday Boy" sticker I had given him.  Many onlookers found the exchange as hilarious as I did!  LOL!

But I guess I have to remember, my hubby is now 28, not 23, so really I am expecting a calm evening with a few friends. 
Be sure to send him some birthday wishes in the comments, I am sure it will make him smile :)

Wednesday, January 18, 2012

Be My *DIY* Valentine Mantel

Cupid must have hit me early (in home decor form) because I am in Looooove with my Valentine's themed fireplace mantel! What makes it even more lovable are the easy little DIY projects that I decorated it with, including...
 ...a framed felt fabric heart backed with skeleton key printed burlap and stacked books wrapped with printed bookends and decorative ribbon.  The bookends spell out lyrics to a sweet song that is special to my husband and I, ahhh the romance!  But romantic quotes or a poem would be sweet too!

First up, let's cover the stacked books with printed bookends tutorial.  All you need are books, ribbon, scissors, and paper to cover the bookends.  I didn't make full book covers because my books have the paperback covers torn off and I didn't think the paper would lay flat enough to look nice.  If you use hardcover books I'd recommend the full covers!
 I decided to print out the lyrics (text) for the bookends opposed to hand writing.  I made sure to space out each line in order to cut out each line of text to add onto the bookends.

 Here is one line cut out (reverse side, text on the other side).  I folded the outer edge so it would appear like a bookend cover instead of a raw edge of paper.
 Then I wrapped the cut out around the edge of my torn paper back (note the folded edge of white paper).

Once I lined it up on the book, I put a crease in the paper that fit the size of the bookend.
 Repeat those steps for how many you are making in a stack and then tie them together with a decorative ribbon! 

***Any guesses on the song lyrics I printed out????***

Now, let's cover the framed felt fabric heart backed with skeleton key printed burlap. Really, this one is pretty simple- take a frame, some fabric to cover the size of the frame, and lay a cut out felt heart on top.
 Ta-da!  Super easy, and super cute!

Here's a look once I got the mantel all set up.  I was really happy with it because it still looks a bit formal and not too cheesy or juvenile, which is often tricky with the pink and red Valentine's color scheme.
 In addition to the books and frames, I got these cute little "XOXO" letter blocks from Target's See Spot Save section for only $2.50. I used them in between each book stack.
 The other framed print is something I made for Alex on our first wedding anniversary (paper is the 'traditional' first first wedding anniversary gift, see the whole list here).
 It is a print of all the addresses that hold a special memory for us- like where we met, where we got engaged, where we got married, etc.  Makes for a cute gift idea for Valentine's Day too!
 Then on the right is another look at the framed felt heart.
 Just simple and sweet all together!

*** Well, have you figured out the song??? ***

(If you haven't heard the song before, you must click the link!)

The reason it hold significance to Alex and I is because his sister Amber and her husband Ryan performed it as a surprise at our wedding reception.
You can't really tell, but I am crying.  Oh, and Amber was only about 3 weeks away from giving birth to our nephew Henri!
Alex and I had never heard the song before our wedding day. We were incredibly moved and touched by their performance.  It is one of my favorite moments from our wedding day!

***** Hope you enjoyed that little romantic side story :) *****

So what do you think of the mantel?

Have you done any Valentine's decorating or projects yet?